
Dedicated Server Setup on Linode
Updated: June 20, 2025
Recently, I decided to rebuild my Unreal Tournament 2004 server on a new platform. The latest Linux versions presented a few challenges, and it took a lot of time and research to get everything working.
Here I’ve tried to document as much as possible to preserve the knowledge and share with others.
These instructions are specifically for a Linode virtual server running Ubuntu 14.04, although most of the setup is similar on other systems.
Table of Contents:
- Server “Hardware”
- UT2004 Server + Bonus Pack
- Pre-Installation Tasks
- Install
- Setup Public Downloads
- Important Fixes
- Start the Game Server!
Server “Hardware”
Using a virtual server at Linode.com. This is what I started with which is plenty good.
- Linode 2048 Plan
- 24GB DISK
- 1 CPU Core
- 2TB XFER
- Ubuntu 14.04 LTS Profile, Latest 64-bit (4.5.0-x86_64)
UT2004 Server + Bonus Pack
As far as I know, this is the most recent dedicated server for Unreal Tournament 2004. The Unreal Tournament 2004 Server v3339 server pack contains all the needed files for running a UT 2004 game server. The Bonus Pack contains additional game maps and add-ons.
Download: Unreal Tournament 2004 Server v3339 + Bonus Pack
Pre-Installation Tasks
Create a user account for the UT server to run.
Do not run the dedicated server as root or any other system account. Best to use a normal user account to run the server.
sudo adduser ut2004
Setup and enable the firewall
Using Uncomplicated Firewall to set up the rules shown below. Read about The Uncomplicated Firewall (ufw) if you want to learn more. I think it’s a great improvement over the old way of messing with iptables.
To check the status of UFW:
sudo ufw status verbose
Allow only SSH, http(s) and UT2004 Server ports:
sudo ufw default deny

sudo ufw allow http

sudo ufw allow https

sudo ufw allow ssh

sudo ufw allow 7777/udp

sudo ufw allow 7778/udp

sudo ufw allow 7787/udp

sudo ufw allow 7788/udp

sudo ufw allow 28902/tcp

sudo ufw allow 8080/tcp

sudo ufw enable
Install legacy GCC library
New versions of Linux, particularly 64-bit distributions, often lack some older libraries because the industry has moved on from supporting legacy 32-bit binaries and outdated dependencies. As a result, older applications—such as UT2004—may fail to run without manually installing these legacy libraries.
Download the 32-bit GCC library libstdc++5_3.3.6-20~lucid1_i386.deb
The libstdc++ library goes in the /usr/lib directory. Use the below procedure:
#Make a temp folder
mkdir tmp

# Unpack file into tmp
dpkg-deb -R libstdc++5_3.3.6-20~lucid1_i386.deb tmp

# Look in tmp then find and copy libstdc++5.0.7 to /usr/lib
cp libstdc++.so.5 /usr/lib

# Make a link to the lib inside the /usr/lib dir
libstdc++.so.5 -> libstdc++.so.5.0.7
Need 32-bit compatibility
On some systems, you have to add extra libraries and such to support 32-bit programs and provide files and libraries used by the dynamically linked ucc-bin executable.
32-bit compatibility libraries
Install the 32-bit compatibility libraries to run 32-bit programs normally. Read more about it here.
apt-get install lib32z1 lib32ncurses5 lib32bz2-1.0
Multi Libs
Enabling the multilib repository allows the user to run and build 32-bit applications on 64-bit installations.
apt-get install gcc-multilib
Install
Unpack Files
Unpack the UT Server files in the ut2004 home directory. This will create a folder named “ut-server” with all the server files inside. After unpacking the files, verify the permissions and ownership are correct.
gzip -d dedicated-server-3339-bonuspack.tar.gz

tar -xvf dedicated-server-3339-bonuspack.tar.gz
Verify File Permission and Ownership
# Ownership

sudo chown -R ut2004.ut2004 ./*

# For Directories

find . -type d -exec chmod 755 {} \;

# For Files

find . -type f -exec chmod 644 {} \;

# ucc-bin must be executable

chmod 755 System/ucc-bin
Custom Startup Script
Download the startup script and put it in the ut2004 home directory. Then chmod the file so it is executable.
chmod 744 UT2004ServerStart
The startup script is simply an easy way to quickly start up a game server.
Usage examples:
- Start a Death Match Server: ./UT2004ServerStart DM
- View help: ./UT2004ServerStart –help
The server log output is directed to ucc-bin.out.
Custom UT2004.ini File
To get started, use this custom UT2004.ini file and change these lines as appropriate for your installation:
[IpDrv.HTTPDownload]
RedirectToURL=http://YOUR.WEB.SERVER/~ut2004/maps/

[Engine.GameReplicationInfo]
ServerName=My Awesome UT Server
ShortName=Yeah
ServerRegion=0
AdminName=MeIsAdmin
AdminEmail=
MessageOfTheDay=Hello

[Engine.AccessControl]
AdminPassword=YouShouldChangeThis
A good resource for creating an ini file is at The Unreal Admin Page
Get a Server CD-Key
You need a CD Key, to advertise your server and collect stats. The cd key generator found on Pastebin works fine. After you generate a key, install it like so:
echo "SRVER-YOUR-CDKEY-HERE" > ut-server/System/cdkey
Web Admin
The web administration page is quite useful for managing the UT server. The default URL is http://your.server:8080
Edit/Create System/XAdmin.ini file to change the admin username and password.
[XAdmin.xAdminConfigIni]
AdminUsers=(AdminName="utAdmin",Password="utPassword",Privileges=,Groups=("Admin"),ManagedGroups=)
AdminGroups=(GroupName="Admin",Privileges=,GameSecLevel=255)
AdminGroups=(GroupName="MatchSetup",Privileges="Xm",GameSecLevel=240)
Setup Public Downloads
When a client connects to a game for which they do not have the game maps and other files, they’ll have to download them from your server. The steps outlined here show how to compress files and use Apache’s user mod for distribution.
Add Download Files
1. Make a public_html directory in the ut2004 home dir: ~/public_html
2. Then make directories like ~/public_html/maps and ~/public_html/temp
3. Go through each of the UT2004 folders and copy these files into the public_html/temp directory:
- .ukx – Animations
- .ut2 – Maps
- .uax – Sounds
- .usx – StaticMeshes
- .int – System
- .u – System
- .utx – Textures
4. Compress the files as shown below. Note -nohomedir is important, or else it fails.
cd ~/ut-server/System

for file in ~/public_html/temp/*; do ./ucc-bin compress -nohomedir $file; done
5. Finally, move all the compressed files into /public_html/maps folder.
Activate Apache’s userdir module
The userdir module is what sets up the option for you to use user directories with Apache.
cd /etc/apache2/mods-available/

a2enmod userdir

service apache2 restart
Important Fixes
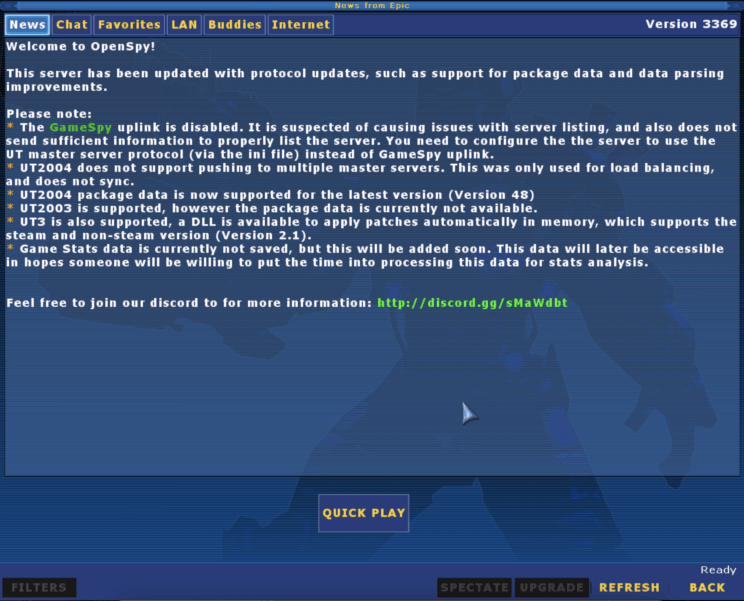
GameSpy is No More
To play online, a client needs to connect to a directory server to look up other servers that are hosting games. This master server was managed by GameSpy until 2014. Afterward, Epic Games maintained the service until January 24, 2023. Now, the only way to get game server lists is to find a master server run by the Unreal community. See ut2004serverlist.com for more detail. There’s also OpenSpy which aims to be an open source gamespy clone.
1. Find this block in System/UT2004.ini :
[IpDrv.MasterServerLink]
LANPort=11777
LANServerPort=10777
MasterServerList=(Address="ut2004master1.epicgames.com",Port=28902)
MasterServerList=(Address="ut2004master2.epicgames.com",Port=28902)
2. Replace the Master Server Lists with the following:
[IpDrv.MasterServerLink]
LANPort=11777
LANServerPort=10777
MasterServerList=(Address="utmaster.openspy.net",Port=28902)
Notes on Master Server Configuration
- Only one
MasterServerListentry is supported in the[IpDrv.MasterServerLink]section. Delete any extras. - For updated community server listings and support, visit: https://ut2004serverlist.com/
- Be sure to make this change on the client side as well — this ensures the game can query a functioning master server and populate the server browser.
- Setting the correct master server tells the game where to look for online matches. After launching the game, the server browser should update with current active servers.
Start the Game Server!
Finally, you are ready to start playing. Now, switch to the ut2004 user go into the home directory, and enter:
./UT2004ServerStart DM
Once that starts, use tail -f ucc-bin.out to view the server’s startup sequence. If all is well, you should see some output like this:
Executing Class Engine.ServerCommandlet
Missing Class Class Editor.TransBuffer
Browse: DM-CarPark-DCSE-XL-2K4?Name=Player?Class=Engine.Pawn?Character=Jakob?team=255?game=XGame.xDeathMatch
Collecting garbage
Purging garbage
Garbage: objects: 35125->35121; refs: 387137
Game class is 'xDeathMatch'
Bringing Level DM-CarPark-DCSE-XL-2K4.myLevel up for play (25) appSeconds: 1.766319...
Loading Admins & Groups
Kick and Ban Privileges Loaded
Maps & Game Privileges Loaded
Admins & Groups Management Loaded
Extra Privileges Loaded
GameInfo::InitGame : bEnableStatLogging False
UdpServerQuery(crt): Port 7787 successfully bound.
Resolving master0.gamespy.com...
Defaulting to false
Resolving ut2004master2.epicgames.com...
Loading Available Maps
Loading Game Types
xWebAdmin.UTServerAdmin Initialized on port 8080
MasterServerUplink: Resolved ut2004master2.epicgames.com as 199.255.40.171.
Resolved master0.gamespy.com (109.71.69.254)
UdpGameSpyUplink: Master Server is master0.gamespy.com:27900
UdpGameSpyUplink: Port 7788 successfully bound.
MasterServerUplink: Connection to ut2004master2.epicgames.com established.
Approval APPROVED
Master server requests heartbeat 0 with code 1176
Master server requests heartbeat 1 with code 1176
Master server requests heartbeat 2 with code 1176
Master server assigned our MatchID: 0
Client netspeed is 10000
New Player Nargonne id=212934ijhjhjh0c96f1b7a779a2f09e
START MATCH
References
- UT2004 Discord – General UT2004 Hangout
- Liandri Archives – Tons of good stuff here
- UT Zone, DE – Many good map downloads and other information
- Play UT2004 Online – Very helpful site for getting your server listed online
- OpenSpy – Community master server support
- OldUnreal – Wiki for UT2004 and other Unreal engine-based games
- Server List on OpenSpy – List of currently running servers